Monday, April 26, 2010
Choco P Nutty Bars

2 cups semi-sweet chocolate chips
2/3 cup peanut butter
6 cups Rice Krispies
3 cups miniature marshmallows
1. In a large microwave safe bowl, melt chocolate chips and peanut butter at medium power for 2 to 2 1/2 minutes. Stir until smooth. Add remaining ingredients. Stir until well coated.
2. Using buttered spatula or waxed paper, press mixture evenly into 13 x 9 x 2 inch baking pan coated with cooking spray. Chill in refrigerator about 45 minutes. Cut into bars.
Tips/Tricks/Notes
I'm so glad I came apon this recipe online, it is so quick and easy to do and the best part? It was a BIG hit with the family and co-workers!! I was able to throw this recipe together in about 10 minutes and with it only taking about 45 minutes in the fridge it's a good recipe if you need something sweet last minute! My only recommendation is to keep the bars stored in the fridge. Once they warm up a bit they crumble a lot when you are trying to eat them!
Saturday, April 10, 2010
Meaty Chili Lasagna

12 uncooked lasagna noodles
1 1/2 pounds of ground beef
1 medium onion, chopped
1 medium green pepper, chopped
2 to 3 jalapeno peppers, chopped
2 tbsp chili powder
1 garlic clove, minced
1 can (10 oz) condensed cream of mushroom soup
1 can (8 oz) tomato sauce
3 tbsp tomato paste
4 cups shredded cheddar cheese
1. Cook the noodles according to the package directions. Meanwhile, in a large skillet, cook beef, onion, peppers and chili powder. Add garlic; cook 1 minute longer. Drain. Add the soup, tomato sauce and tomato paste; simmer until heated through.
2. Drain noodles. Spread 1/2 cup meat sauce in a greased 13 x 9 baking dish. Layer with four noodles, half of the remaining sauce and a third of the cheese. Repeat layers once. Top with remaining noodles and cheese.
3. Cover and bake at 350 degrees for 30 minutes. Uncover; bake 15 minutes longer or until cheese in melted. Let stand for 15 minutes before cutting.
Tip/Tricks/Notes
This had to be one of the best lasagna's I've ever had! I found this recipe in a Taste of Home magazine that I bought well waiting in line at the grocery store one day. The recipe was super easy to follow and turned out perfect! The only tip I have is to be careful when cutting the jalapeno peppers. You will either want to use disposable gloves or make sure to wash you hands throughly and definitely avoid touching your face!
The picture seen above is an actual picture I took of my completed lasagna, it is not taken from the internet or played with in anyway.
Tuesday, April 6, 2010
Spring Time Citrus Pie

Recently I decided to join "You Want Pies With That?". Each month a theme is posted and you have to create a creative and unique pie to go with that theme. April's theme is "Spring", below is the pie recipe that I feel is very springy!
Crust:
17 oz roasted macadamia nuts
3/4 cup ground vanilla wafer cookies
1/4 cup firmly packed brown sugar
1/4 cup unsalted butter, melted
Filling:
2 cups fresh pink grapefruit juice
1/4 cup sugar
1 1/4 tsp unflavoured gelatin
1/4 cup fresh lime juice
9 oz white chocolate
1/4 whipping cream
Topping:
1 cup chilled whipping cream
2 tbsp sugar
lime slices
Crust Directions
1. Preheat oven to 350 degrees. Finely chop nuts and then add ground cookies, sugar and butter. Blend until moist crumbs form.
2. Press firmly onto bottom and sides of a 9 1/2 inch deep dish glass pie dish. Bake crush until golden, about 10 minutes. Cool.
Filling Directions
1. Boil grapefruit juice and 1/4 cup sugar in heavy medium saucepan over high heat until reduced to 3/4 cup; about 15 minutes. Meanwhile, sprinkle gelatin over lime juice and let stand 10 minutes.
2. Add gelatin mixture, white chocolate and 1/4 cup cream to grapefruit mixture and whisk over low heat until white chocolate and gelatin melt and mixture is smooth. Pour into large bowl.
3. Refrigerate until cool but not set, whisking occasionally and scraping down sides of bowl with rubber spatula, about 2 hours.
4. Pour into cooled pie crust and return to refrigerator.
Topping Directions
1. Beat cream and sugar to stiff peaks. Spoon whipped cream into pastry bag fitted with star tip. Pipe rosettes of cream around edge of pie. Place lime slices rounded side up on pie.
Tips/Tricks/Notes
I was a little worried about how this pie would turn out when I first started, but I needed a springy pie and I thought, this is it! The colours, the flavours all scream Spring to me! Happily, it turned out to be wonderful!
In the future I plan on making a coconut cream pie with the crust, it tasted great on its own! Also, a note on the crust; if macadamia nuts are out of your budge then trying walnuts or almonds instead.
The filling tasted just as I had hoped! I was concerned only because I had never heard of such a idea and never tried using grapefruit for anything. Also, when I planned the pie I wasn't sure how the colour would come out and it ended up so bright. The only change I would make next time is I would up the amounts of each ingredient, maybe one and a half, as the filling could have come up a little higher on the crust.
All and all I am very glad I decided to join "You Want Pies With That?" and I can't wait to continue to try out more pies!
Sunday, April 4, 2010
My First Blog Award!

1. When you have received this award you must thank the person that awarded you the award in a new post.
I'd like to thanks Brattypants for giving me my first award! I am very honored and so pleased to have been given this award! Thanks again! :D
2. Name 10 things that make you happy.
- My Boyfriend; Kevin
- My Family
- My Close Friends! You know who you are ;)
- My 2 Wonderfully Adorable Cats; Sunny and Zephyr
- Baking & Cooking
- Fresh Air & Sun
- Gardening
- Reading a Good Book
- Watching my Fav TV Shows
- Winning an Award
- Brattypants; I definitely must pass this award back to her!
- Corrine at Lost for Words; My Best Friend, who inspired me to blog!
- Barbara at Barbara Bakes
- Sarah at Maison Cupcake
- Stormie at Bite Size Baker
- Christine at Christine's Cuisine
- Amy at Sing for your Supper
- Jessica at My Baking Heart
- Nancy at My Home Cook-N Blog
- Kelsey at Apple a Day
Now back to finishing my pie for tonight's Easter dinner at my Grandparents! I will inform all the winners I picked sometime tomorrow!
Thanks Again!
Thursday, April 1, 2010
Helpful Tips from Tipnut
After almost a year of being unemployed, I finally started back to work this week! Yah! What that has meant though, is I have been slacking in the blogging and cooking/baking area! I promise it won't last, I am just trying to adjust back to the early mornings and working "9-5". I have plans for a pie for this Easter weekend to take to my Grandparents Easter dinner and there may also be some other sweets! I also joined the Daring Bakers and will be working on my first challenge very soon!
I just wanted to share with you some tips from a site called Tipnut. I'm just going to paste some of the tips I found most interesting and will then link to the complete article.
45 Cooking & Baking Tips - A Collection of Timeless Wisdom
- Add one teaspoon of lemon juice to each quart of water when cooking rice, this will keep rice fluffy.
- For crisper salads: Place a saucer upside down in the bottom of the salad bowl before filling with salad. Excess moisture will run underneath the saucer and this will help keep the salad crisp and fresh.
- You can substitute crumbled cornflakes for bread crumbs when making meatloaf.
- A teaspoon of sugar mixed with your yeast and water makes it raise better. Even if you are making bread you can use some sugar. Never mix salt directly with the yeast and water mixture as the salt kills the raising action.
- If it is a meringue pie you are making…add four or five marshmallows cut into pieces or 1/2 cup miniature ones, to meringue just before spreading. These marshmallows give both flavor and body to the meringue. The latter is important if pie is to stand for sometime before serving.
- A wire cheese cutter is ideal for cutting chilled refrigerator cookie dough.
Sunday, March 28, 2010
Hot Dog Macaroni

1 package (16 oz) hot dogs
2 cups uncooked corkscrew pasta
2 cups shredded cheddar cheese
2 cups 1% milk
1. Slice hot dogs into bite sized pieces; set aside.
2. In large saucepan, cook pasta according to package directions; drain and return to saucepan.
3. Stir in hot dogs, cheese and milk. Cook over medium heat 10 minutes or until cheese is melted, stirring occasionally.
Tips/Tricks/Notes
I LOVE this recipe! It is so quick and so easy, and brings back memories of being a kid! My only tip for this recipe is to do with the amount of milk. I found the pasta ended up a little more runny then I would like. Next time I will probably put a little less then the 2 cups of milk, but not too much less.
Also, I wanted to share with everyone my camera/picture experiment. I've been a little unhappy with my food pictures and have been trying to figure out why they aren't as good as others I have seen. I had Kev bring his camera home from work and took pictures of the pasta with his and with mine. As you can see in the comparison pictures below, his camera is definitely much better then mine!

The picture seen above is an actual picture I took of my completed macaroni, it is not taken from the internet or played with in anyway.
Friday, March 26, 2010
"Best-Ever" Meatloaf & Cheesy Cauliflower

Meatloaf:
1 can (10 oz) Campbell's condensed cream of mushroom soup
1 small onion, finely chopped
1 egg, beaten
2 pounds ground beef
1/2 cup dry bread crumbs
1/3 cup water
1. Thoroughly mix 1/2 cup soup, onion, egg, beef, and bread crumbs in a large bowl. Place the mixture into a 13x9x2 inch baking pan and firmly shape into an 8x4 inch loaf.
2. Bake at 350 degrees for 1 hour 15 minutes or until the meatloaf is cooked through.
3. Heat 2 tbsp pan drippings, remaining soup and water in a 1 quart sauce pan over medium heat until the mixture is hot and bubbling. Serve the sauce with the meatloaf.
Cauliflower:
1 can (10 oz) Campbell's condensed cheddar cheese soup
1/4 cup milk
4 cups fresh or frozen cauliflower
1. Stir the soup and milk in a 2 quart microwavable casserole. Add the cauliflower. Cover the dish with plastic wrap.
2. Microwave on high for 8 minutes or until the cauliflower is tender-crisp, stirring once.
Tips/Tricks/Notes
I'll start with the meatloaf because it was a bit of a learning experience. I had never done meatloaf until today, so this was a first time thing! I found this recipe in my Campbell's recipe book and figured it would be pretty good since it's called "Best-Ever". Not to say it's bad, but it's definitely not the "Best-Ever". I thought something was missing, however Kevin quite enjoyed it. I'm wondering if anyone can give me tips on meatloaf, something I could add or change about this recipe? It always throws me off when I'm not into the recipe, but Kevin on the other hand enjoys it! If he likes the recipe, I am always happy to give it another shot, but I am hoping someone can suggest something that might "spice" it up for me!
If you plan on trying this recipe, my only tip is, when it says "firmly shape into an 8x4 inch loaf", it means FIRMLY! Maybe it is just because I had never tried meatloaf before, but my loaf definitely crumbled a lot!
As for the cauliflower, I have done this simple recipe many times and not always with cauliflower. Broccoli of course is another big hit!
The picture seen above is an actual picture I took of my completed meatloaf and cauliflower, it is not taken from the internet or played with in anyway.
Tuesday, March 23, 2010
Maple Meatballs

3/4 cup ketchup
1/2 cup maple syrup
1/4 cup low sodium soy sauce
1 tsp dry mustard
1 package (16oz) frozen, cooked meatballs
1. Combine and stir all ingredients in the crockpot, if meatballs are frozen, set to high for the first hour, and then low for 3 more hours. Serve with toothpicks or on baguettes.
Tips/Tricks/Notes
I found this recipe on the blog Annie Bakes. It is a super easy meatball recipe, and they were so yummy! Next time I plan on making my own meatballs when I do this recipe. There isn't much more to be said about this recipe, it's definitely one to try! The only change I had to make was to the time, I accidentally bought uncooked frozen meatballs instead of cooked ones, so I thawed the meatballs then cooked them on HIGH for the 4 hours instead of dropping the crockpot to LOW.
The picture seen above is an actual picture I took of my completed meatballs, it is not taken from the internet or played with in anyway.
Saturday, March 20, 2010
Cake Mix Cookies - Devil's Food & Lemon

1 boxed cake mix (any flavour)
2 eggs, lightly beaten
1/2 cup oil
3/4 cup chips (any flavour)
1. Preheat oven to 350 degrees. In a large bowl combine all ingredients, mixing well. Spoon batter in about 2 tbsp sized balls and place on baking tray. Bake in oven for 10-12 minutes. Cool briefly on trays before removing to wire rack to cool completely.
Tips/Tricks/Notes
I found this recipe on the blog Cathlin Cooks... but Mostly Bakes! I usually prefer to bake cookies from scratch but I had a few cake mixes around the house that I had bought during sales. This recipe is a quick and easy way to use up those extra mixes! The cookies on the left in the picture are Lemon Cake Mix with White Chocolate Chips and the cookies on the right are Devil's Food Mix with Butterscotch Chips.
The picture seen above is an actual picture I took of my completed cookies, it is not taken from the internet or played with in anyway.
Friday, March 19, 2010
Blogs that Inspire Me!

I've been at this whole blogging thing for a bit now and have found a nice amount of blogs I enjoying dropping by regularly! I wanted to share those blogs with my readers. All the blogs are food related blogs except for the first one, which is my best friend Corrine's blog and a must view if you love to read!
Lost for Words - http://www.lostforwords-corrine.blogspot.com/
Annie Bakes - http://anniebakes.blogspot.com/
Barbara Bakes - http://www.barbarabakes.com/
Bite Size Baker - http://bitesizebaker.com/
Brattypants - http://brattypants.blogspot.com/
Maison Cupcake - http://blog.maisoncupcake.com/
I also joined 'You Want Pies With That?' (http://pieswiththat.blogspot.com/), Where every month you must bake a unique pie that goes along with that months theme. To learn more, visit the blog! I already have my idea for April's theme "Spring"! Can't wait!
Wednesday, March 17, 2010
Crock Pot Chicken Fajitas

2 pounds boneless skinless chicken breast halves
1 onion, thinly sliced
1 sweet red bell pepper, julienned
1 tsp ground cumin
1 1/2 tsp chili powder
1 tbsp lime juice
1/2 cup chicken broth
8 to 10 warmed flour tortillas
Toppings (ie, guacamole, sour cream, lettuce, tomatoes, cheese, salsa)
1. Cut chicken into diagonal strips and place in slow cooker sprayed with cooking spray.
2. Top with onion and bell pepper. In bowl, combine cumin, chili powder, lime juice and chicken broth and pour over chicken and veggies.
3. Cover and cook on LOW for 5 to 7 hours.
4. When serving, spoon several slices of chicken mixture with sauce into center of each warm tortilla and add any additional toppings of your choice, then fold.
Tips/Tricks/Notes
I have decided that I love my crock pot! It really is the most handy thing ever! I love being able to throw together dinner in the morning and have everything ready for dinner that night! This recipe is a very easy recipe and it is also very tasty. I didn't add the peppers as I didn't have any in the house at the time. I also found the cumin to be a little over powering and won't add as much next time.
The picture seen above is an actual picture I took of my completed fajitas, it is not taken from the internet or played with in anyway.
Monday, March 15, 2010
Coming This Week...

For dinner tonight I finally made the Chicken Fajitas I had been planing for a long time, so look for that recipe in the next day or two! I also have a few goodies planned for this week as I have a few things that need to be used as they are coming up to their expiry dates in the next month.
Baking
- Cake Mix Cookies
- Lemon Tarts
- Lemon Chicken
Baking
Sunday, March 14, 2010
Pina Colada Muffins

1/2 cup unsalted butter, melted and cooled
1/2 cup brown sugar
2 tsp vanilla
2 tsp rum
3 very ripe bananas, mashed
1 cup crushed pineapple
2 large eggs
1 cup all purpose flour
1 cup whole wheat pastry flour
3/4 tsp baking soda
3/4 tsp baking powder
1/4 tsp salt
1 tsp cinnamon
sweetened shredded coconut
1. Preheat oven to 350 degrees. Lightly grease a 12 cup muffin tin.
2. In a large bowl combine the melted butter, sugar, vanilla and rum. Mix to combine.
3. Add the bananas, pineapple and eggs and mix until thoroughly combined.
4. In a separate bowl, combine the flours, baking soda, baking powder, salt and cinnamon.
5. Add dry ingredients to wet ingredients and mix only until combined.
6. Scoop batter into the prepared muffin tins and top each with a sprinkle of coconut.
7. Bake for 20 minutes or until toothpick comes out clean in the center of a muffin.
8. Cool in pan for 5 minutes, then remove and cool completely on wire rack.
Tips/Tricks/Notes
I found this recipe on the blog Christine's Cuisine and thought I would give it a try for Kevin as he loves all of the ingredients found in the recipe. These muffins are very yummy, but you cannot taste the pineapple. The banana and coconut flavours are what you taste when eating one of these muffins. The next time I try this recipe I will most likely not include the pineapple, but I still highly recommend giving it a try first!
The only note for this recipe is that I used paper muffin cups instead of greasing the pan. I much prefer the paper cups with muffins.
The picture seen above is an actual picture I took of my completed muffins, it is not taken from the internet or played with in anyway.
Wednesday, March 10, 2010
Recipe Book Review; Hershey's Cookbook & Recipe Cards

"Hershey's Cookbook & Recipe Cards is the perfect resource for baking the ultimate dessert, then sharing the recipe with your family and friends. Forty-eight delicious classics await you, each with step by step instructions and a mouthwatering photo of the final recipe - and for each one, you'll also find a collectible card to tear and share."
Recipes I Recommend
- Kisses Macaroon Cookies
- Secret Kisses Cookies
- Peanut Butter Blossoms
- White Chip Lemon Streusel Bars
- Rocky Road Brownies
Rating:
Find this Book on Amazon: Hershey's Cookbook & Recipe Cards
Monday, March 8, 2010
Coming This Week...

I don't have a lot of big baking or cooking plans for this week, as Kevin is still away on Business. He will be arriving home this weekend, can't wait! My only plans are to bake him some Welcome Home muffins. I'm planning them to be a surprise, so I won't be sharing specifics! You'll get to know once I post the recipe!
Review of Last Week
I did build myself a photo box this past week. I feel that the pictures are better with the use of the box, but I'm still not completely happy. My camera is fairly old, it's pretty much an original digital camera, so I'm thinking this may have something to do with the quality of the images. When Kevin gets home, I would live to try out his camera as it is a much better camera, then go from there!
Baking
- Triple Chocolate Quick Bread - Recipe posted, but Adjusted to Double Chocolate Quick Bread with a Peanut Butter Glaze
Saturday, March 6, 2010
Chocolate and Peanut Butter Marble Fudge

1 can (300 mL) sweetened condensed milk, divided
8 squares (1 oz each) semi-sweet or dark chocolate, chopped
6 squares (1 oz each) white chocolate, chopped
1/2 tsp baking soda, divided
1/2 tsp vanilla extract
1/4 cup peanut butter
1. In one small sauce pan, heat half a can of sweetened condensed milk with semi-sweet or dark chocolate and 1/4 tsp baking soda. Stir frequently until chocolate is melted. Stir in vanilla extract.
2. In another small sauce pan, heat remaining sweetened condensed milk with white chocolate, 1/4 tsp baking soda and peanut butter, stirring until melted.
3. Pour chocolate mixture into parchment lined 8" square pan. Pour peanut butter mixture on top and swirl with spoon or knife. Cool for 4 hours or until firm.
Tips/Tricks/Notes
This is another quick, easy and tasty fudge recipe! The only thing I would do the next time is add a little bit more peanut butter. I found the chocolate to over power the peanut butter!
The picture seen above is an actual picture I took of my completed fudge, it is not taken from the internet or played with in anyway.
Wednesday, March 3, 2010
Double Chocolate Quick Bread with a Peanut Butter Glaze


1 1/2 cups semi sweet chocolate chips, divided
1/2 cup butter, softened
2/3 cup packed brown sugar
2 eggs
1 1/2 cups unsweetened applesauce
2 tsp vanilla extract
2 1/2 cups all purpose flour
1 tsp baking powder
1 tsp baking soda
1 tsp salt
Glaze
3 tsp half and half cream
2/3 cup powdered sugar
1 tbsp peanut butter
1. In a microwave safe bowl, melt 1 cup chocolate chips; set aside to cool. In a large bowl, cream butter and brown sugar until light and fluffy. Add eggs and cooled chocolate; mix well. Add applesauce and vanilla; set aside. Combine flour, baking powder, baking soda and salt; add to creamed mixture and mix well. Stir in the remaining chocolate chips.
2. Spoon into four greased 5 3/4 x 3 x 2 inch loaf pans. Bake at 350 degrees for 35-40 minutes or until a toothpick inserted near the center comes out clean. Cool for 10 minutes before removing to wire racks.
3. For glaze, combine the cream, powdered sugar and peanut butter. Stir until smooth. Drizzle over warm breads. Cool completely.
Tips/Tricks/Notes
This bread is SO moist and tasty! I also think the chocolate flavour is just right. I find a lot of chocolate cakes/breads can be very over powering. This bread has just the right chocolate taste for my likings!
The original of this recipe can be found on Taste of Home. I actually found this recipe through Barbara Bakes who created a version of the recipe with cherries in the bread. I am not a huge fan of cherries but liked the sounds of the recipe so I created my own adaptation. Although I do love chocolate, I thought triple chocolate might be a little too much; I know, I know, is that even possible?! I choose to replace the chocolate glaze with a peanut butter one! Also, I used two 8 x 3 x 2 loaf pans instead of the four smaller ones. This meant I had to bake the bread for an extra 25 minutes.
The picture seen above is an actual picture I took of my completed bread, it is not taken from the internet or played with in anyway.
Monday, March 1, 2010
Coming This Week...

This week and next may be a quiet week for recipes for me. Kevin left yesterday for the East Coast on business and will be gone for 2 weeks. He frequently travels for work, and when he is gone, I have to admit I don't eat much at all! I find cooking is more enjoyable when you are doing it for other people! I will however try to bake a few things. Baking I can pass on to family and friends!
This is week I am also planning on build a photo box. I haven't been 100% happy with the photo's of my food so far and I think it mostly has to do with lighting. I plan on following the directions found in this blog post: How to DIY Macro Photo Studio. I will post comparison photo's and more details once I have completed the build to let everyone know how it works.
Baking
- Triple Chocolate Quick Bread
- Molten Middle Cookies
Review of Last Week
I created an Archive page; it can be found here: Recipe Archive.
Crock Pot Recipes
- Chicken Fajitas - Planned for when Kevin returns
- Classic French Toast - Recipe Posted
- Chocolate & Peanut Butter Fudge - Still need to post recipe
- Molten Middle Cookies - Moved to current week
Sunday, February 28, 2010
Recipe: Fake 'Em Out Ravioli Lasagna


3 cups Prego Italian Sausage & Garlic Italian Sauce
1/2 cup water
1 package (30 oz) frozen regular size cheese filled ravioli (about 30 to 40)
1 1/2 cups shredded mozzarella cheese
Grated Parmesan cheese and chopped fresh parsley
1. Heat oven to 350 degrees. Spray a 3 quart shallow baking dish with cooking spray.
2. Stir the sauce and water in a medium bowl. Spread 1 cup sauce mixture in the baking dish. Top with 1/2 of the ravioli, 3/4 cup mozzarella cheese and 1 cup sauce mixture. Top with remaining ravioli and sauce mixture. Cover the baking dish.
3. Bake for 35 minutes or until the mixture is hot and bubbling. Uncover the baking dish. Sprinkle with the remaining mozzarella cheese.
4. Bake for 10 minutes or until the cheese is melted. Let stand for 10 minutes. Garnish with the Parmesan cheese and parsley.
Tips/Tricks/Notes
I found this recipe in one of my new recipe books I purchased about a week ago. It's a Campbell's recipe book that contains more then 400 recipes. I have to say, this is one of the easiest and tastiest recipes I have done! In this household, we love our pasta's and this recipe will definitely be on the top of my list as a regular! It is very flexible; change the sauce, or the ravioli, or both! You could try a meat ravioli instead of cheese! The leftovers are also wonderful!
The picture seen above is an actual picture I took of my completed pasta, it is not taken from the internet or played with in anyway.
Friday, February 26, 2010
Recipe: Classic French Toast

3 eggs
1 cup milk
2 tbsp sugar
1/4 tsp salt
1/8 tsp ground cinnamon
1/8 tsp ground nutmeg
8 slices day old french bread
1. In a bowl, beat eggs. Beat in milk, sugar, salt, cinnamon and nutmeg.
2. Soak the slices of bread for a few seconds on each side.
3. Cook on a hot greased griddle until golden brown on both sides and cooked through.
4. Sprinkle with powdered sugar and drizzle with warm maple syrup.
Recipe taken from; Sugar & Spice by Celeste's Blog.
Tips/Tricks/Notes
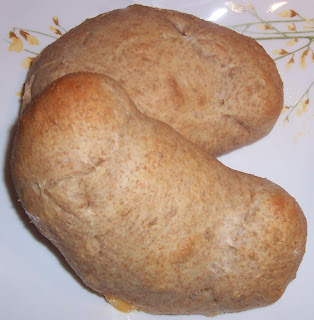
As you may be able to guess from the photo, I made one change to this recipe. I choose to use a thick sliced white bread instead of the french bread. I will probably try the french bread in the future with this recipe, but I felt like using a bread I was use to with french toast for the first try at the recipe.
The flavours were excellent in the recipe! My only suggestions, when it says soak for a few seconds on each side, make sure to not over soak, it really means a few seconds. My other suggestion is to definitely make sure that you have fully cooked each piece thoroughly!
I am also a big fan of cinnamon, so I also sprinkled more cinnamon on my toast with the powdered sugar!
The picture seen above is an actual picture I took of my completed french toast, it is not taken from the internet or played with in anyway.
Wednesday, February 24, 2010
Recipe Archive

Crock Pot Recipes
Desserts
- Brown Sugar Fudge
- Cathedral Cookies
- Cherry Polka Dot Fudge
- Chocolate & Butterscotch Fudge
- Chocolate Covered Banana Pops
- Cookies & Cream Fudge
- Lemon Lover Cookies
- Macaroon Cookies with Kisses
- Maple Sugar Cookies
- Nanaimo Bars
- Peanut Butter & Chocolate Chip Cattails
- Peanut Butter Blossoms
- Peanut Butter Cake Bars
- Peanut Butter Fudge
- Vanilla Lemon Cake
- White Chip Lemon Streusel Bars
Recipe: Peanut Butter Cake Bars


2/3 cup butter, softened
2/3 cup peanut butter
1 cup sugar1 cup packed brown sugar
4 eggs
2 tsp vanilla extract
2 cups all purpose flour
2 tsp baking powder
1/2 tsp salt
1 package (11 1/2 oz) milk chocolate chips
1. In a large bowl, cream the butter, peanut butter, sugar and brown sugar. Add eggs, one at a time, beating well after each addition. Beat in vanilla. Combine the flour, baking powder and salt; gradually add to the creamed mixture. Stir in chocolate chips.
2. Spread into a greased 13 x 9 inch baking pan. Bake at 350 degrees for 45-50 minutes or until a toothpick inserted near the center comes out clean. Cool on wire rack. Cut into bars.
Tips/Tricks/Notes
This recipe has a great peanut buttery taste and is nice and light for a cake! I will note, it is very crumbly, so watch for the mess! Also, it ended up double the thickness of the original recipe pictures. It's a perfect example of why I take my own pictures! The next time I do this recipe I may also turn down my oven slightly, but I have come to realize my oven seems to get hotter then most others. I have had to lower the temperature for almost every recipe I have done! The only other thing, I used semi-sweet chocolate chips instead of milk chocolate because that is what I had on hand!
Recommendation: Try crunchy peanut butter versus smooth!
The picture seen above is an actual picture I took of my completed cake, it is not taken from the internet or played with in anyway.
Monday, February 22, 2010
Coming This Week...

As per a suggestion from a friend, I will be creating a Archive Post this week that will link on my right column. This is so that new visitors and of course my regular visitors can easily access older recipes I have posted. I thank Corrine, for this wonderful idea!
Crock Pot Recipes
- Chicken Fajitas
- Classic French Toast
- Chocolate & Peanut Butter Fudge
- Molten Middle Cookies
Crock Pot Recipes
- Make-Believe Lasagna - Completed, recipe to be posted
- Chicken Fajitas - Move to this week
- Nutella Candy Cookie Pizza - Planned for a later date
- Maple Fudge - Recipe did not turn out, I will be trying to figure out what went wrong
- Chocolate & Butterscotch Fudge - Recipe posted
- Mint Chocolate Fudge - Planned for a later date, grocery store was out of peppermint extract
- Peanut Butter Cake Bars - Completed, recipe to be posted
- Lemon Lover Cookies - Recipe posted
- Molten Middle Cookies - Moved to this week
Saturday, February 20, 2010
Recipe: Lemon Lover Cookies
Lemon Lover Cookies


3/4 cup butter, softened
3 tbsp sugar
2 tsp lemon juice
1 cup all-purpose flour
1/2 cup cornstarch
1 tsp grated lemon peel
Lemon Frosting
1/4 cup butter, softened
1 cup confectioners sugar
2 tsp lemon juice
1 tsp grated lemon peel
1. In a small bowl, cream butter and sugar until light and fluffy; about 5 minutes. Beat in lemon juice. Combine the flour, cornstarch and lemon peel; gradually add to creamed mixture and mix well.
2. Shape into a 1-1/2 roll; wrap in plastic wrap. Refrigerate for 1 hour or until firm. Unwrap and cut into 1/4 inch slices. Place 2 inches apart on ungreased baking sheets.
3. Bake at 350 degrees for 10-12 minutes or until edges are golden brown. Cool for 3 minutes before removing to wire racks to cool completely.
Frosting
4. In a small bowl, beat butter until fluffy. Add the confectioners sugar, lemon juice and peel; beat until smooth. Spread over cooled cookies; sprinkle with additional lemon peel if desired. Let stand until set. Store in airtight container.
Tips/Tricks/Notes
Being an avid lemon lover this recipe was a must try. After completing the cookie dough and baking the cookies I felt I had missed something, but I tasted a cookie before icing and it tasted perfect. Later on in the afternoon well making another recipe I discovered I miss read the measurements on the package of my butter. Here I had under measured the butter for this recipe. Although I had made this mistake the cookies still turned out well, and healthier with less butter! I was very shocked with my mistake as I am a stickler for double and triple checking everything, but mistakes can still be made!
Recipe adjustment: Instead of garnishing cookies with lemon peel, I decided to add yellow food colouring to the icing. I added 4 drops of yellow to get the nice light yellow you see in the pictures above. I also used an decorating tip for easy icing of the cookies.
The picture seen above is an actual picture I took of my completed cookies, it is not taken from the internet or played with in anyway.
Thursday, February 18, 2010
Recipe: Chocolate and Butterscotch Fudge
Chocolate and Butterscotch Fudge

The picture seen above is an actual picture I took of my completed fudge, it is not taken from the internet or played with in anyway.

2 cups semi-sweet chocolate chips
1 can (14 oz) sweetened condensed milk
1/2 cup chopped walnuts
1 tsp vanilla extract
1 cup butterscotch chips
1. Line an 8 or 9 inch square pan with wax paper.
2. Melt chocolate chips with 1 cup condensed milk in saucepan over low heat. Remove from heat; stir in nuts nuts, if desired, and vanilla. Spread evenly into prepared pan.
3. Melt butterscotch chips and remaining sweetened condensed milk in clean saucepan over low heat. Spread evenly over chocolate layer.
4. Chill for 3 hours or until firm. Cut into squares.
Tips/Tricks/Notes
This is another easy and tasty fudge! The recipe is easy to follow. You really can't mess this one up! When I first completed the fudge I thought the butterscotch layer was going to be too thin and the chocolate would be over powering, but once I tasted the fudge; the flavours are just right! Only note is that I didn't add the chopped walnuts.
Tuesday, February 16, 2010
Coming This Week...
Coming This Week
Every Monday I am going to start posting what recipes I am planning to try for the week. Yes, I know today is Tuesday, yesterday was a holiday here in Ontario and I was taking it easy! After this post, all others will be on Monday. I may not be able to get all the recipes I list posted with my comments in the same week I try them as some weeks I will have a lot more recipes, but I will try to get them posted within 2 weeks of the coming this week post.
Crock Pot Recipes
- Make-Believe Lasagna
- Chicken Fajitas
- Nutella Candy Cookie Pizza
- Maple Fudge
- Chocolate & Butterscotch Fudge
- Mint Chocolate Fudge
- Peanut Butter Cake Bars
- Lemon Lover Cookies
- Molten Middle Cookies
Monday, February 8, 2010
Recipe: Crock Pot - Mushroom & Onion Chicken
Crock Pot Mushroom and Onion Chicken

6 skinless, boneless chicken breasts
6 tbsp butter
1 (1oz) package dry onion soup mix
1 cup converted long-grain white rice
1/4 cup grated parmesan cheese
1 1/2 cups milk
2 cans condensed cream of mushroom soup
salt & pepper
1. Mix together onion soup mix, milk, cream of mushroom soup and rice in a medium bowl.
2. Lightly grease slow cooker. Lay chicken breasts in the bottom of slow cooker. Place one tablespoon butter on each chicken breast and pour soup mixture over all. Season with salt and pepper to taste and sprinkle with grated parmesan cheese.
3. Cook on low for 8 to 10 hours, or on high for 4 to 6 hours.
Tips/Tricks/Notes
The original name I found this recipe under was "Parmesan Chicken", but I decided to rename it due to the fact that the parmesan cheese isn't even tasted. The mushroom and onion flavours jump out more then the parmesan. I used only 3 chicken breasts since there are only 2 of us in the house and therefore 6 would be way too much food. I did however, leave all the other ingredients the same as we always enjoy lots of rice!
My only suggestion is to not over cook this! I cooked this on low for almost 9 hours and found the chicken was a little dry. Overall, it wasn't the best slow-cooker recipe I have tried so far. The chicken was nothing spectacular, just chicken, but I will probably make it again as the rice was a big hit in the house!
Sunday, February 7, 2010
Flour an Important Ingredient
What is Flour?
In the culinary sense, flour is a powder made of cereal grains, other seeds, or roots.
Types of Flour
Below are some of the most common types of flour with small descriptions. (www.about.com)
Wheat Flour
Wheat flour is the most common flour used in baking. There are different types of wheat flour, and they're distinguished by the amount of gluten they contain.
Gluten is the wheat's natural protein, and it's what gives baked goods their structure. When dough is kneaded, these glutens develop and become firm. Flours made from hard, high-protein varieties of wheat are called strong flours. They have a higher gluten content. Flours made from softer, low-protein wheats are called weak flours, and are lower in gluten.
All-Purpose Flour
All-purpose flour is formulated to have a medium gluten content of around 12 percent or so. This makes it a good middle-of-the-road flour that can be used for a whole range of baking, from crusty breads to fine cakes and pastries. Even so, most professional bakers don't use all-purpose flour but instead use either bread flour, cake flour or pastry flour, depending on what they are baking.
One sifted cup of all-purpose flour should weigh around 4½ ounces or 125 grams.
Bread Flour
Bread flour is a strong flour, meaning that it has a relatively high gluten content — usually around 13 to 14 percent. A handful of bread flour will feel coarse and will look slightly off-white. Bread flour is used for making crusty breads and rolls, pizza doughs and similar products.
One cup of bread flour will weigh around 5 ounces or 140 grams.
Cake Flour
Cake flour is made from soft wheat and has a lower gluten content — around 7½ to 9 percent. Its grains are visibly finer than bread flour, and it is much whiter in color. Its fine, soft texture makes it preferable for tender cakes and pastries.
One sifted cup of cake flour will weigh around 3½ ounces or 99 grams.
Pastry Flour
Pastry flour is slightly stronger than cake flour, at around 9 to 10 percent gluten. It can be used for biscuits, muffins, cookies, pie doughs and softer yeast doughs. It has a slightly more off-white color than cake flour.
One sifted cup of pastry flour will weigh just over 3½ ounces, or around 101 grams.
Self-Rising Flour
Self-rising flour is a peculiar bird. It's basically ordinary all-purpose flour that has baking powder and salt added to it. Intended as a convenience, it's really anything but — the main problem being that there's no way to control how much baking powder it contains. Also, when stored in humid climates, the baking powder in the flour will quickly lose its effectiveness, making things even more unpredictable. Unless you have no other options, this type of flour is probably best avoided.
Monday, February 1, 2010
Recipe: Vanilla Lemon Cake
Vanilla Lemon Cake


The picture seen above is an actual picture I took of my completed cake, it is not taken from the internet or played with in anyway.


Vanilla Cake
1 cup white sugar
1/2 cup butter
2 eggs
2 tsp vanilla extract
1 1/2 cups all purpose flour
1 3/4 tsp baking powder
2/3 cup milk
Other Ingredients
Shirriff lemon pie filling or lemon pie filling of choice
2 340g cans of vanilla icing
Vanilla Cake Directions:
1. Preheat oven to 325 degrees. Grease an 8 x 2 inch round cake pan.
2. In a medium bowl, cream together the sugar and butter. Beat in the eggs, one at a time, then stir in the vanilla. Combine flour and baking powder, add to the creamed mixture and mix WELL. Finally stir in the milk until batter is smooth. Pour or spoon batter into the prepared pan.
3. Bake for 30 to 40 minutes in the preheated oven. Cake is done when tooth pick or knife is inserted through the center and it comes out clean.
Lemon Cake Directions:
1. Prepare 2 cakes as per the above directions; one for the bottom layer, and one for the top layer. Remove from pans and place on wire rack to cool. Cool completely!
2. Prepare lemon filling as per instructions and place aside to let cool slightly.
3. Once cakes are cooled completely use a knife to gently even tops of both cakes. Ideally both cakes should be as flat and level as possible. Place one cake on flat serving plate or cake catty. Spoon lemon filing on to the top of this layer; smooth evenly across top making sure to not let any flow over edges. Place second cake gently on top of lemon filling.
4. Using vanilla icing, ice the sides and top of cake. Cover and keep in cool place until ready to serve.
Tips/Tricks/Notes
This cake was a BIG hit and I will definitely be making it again. I also can't wait to try it with different fruit fillings, so if you maybe don't like lemon, try it with raspberry, blueberry, lime... or just use vanilla icing for the middle!
I had to make a few adjustments to the original recipe for the vanilla cake that I found. First, I had to adjust the amount of milk in the recipe. It was only 1/2 a cup, I upped that to 2/3 to make the cake more moist. Second, the temperature for the oven was too high. It was originally 350 degrees. When I first did this recipe at this temp I had to discard the cake as the outside was burnt and the inside had not yet cooked. My last tip is when pouring the batter into the pan make sure to level it out very well.
Cornstarch; What the Heck is it?
Cornstarch
Definition; it is a thickening agent that is the bland, gluten-free alternative to flour for frying and for sauces and gravies. Use it in cakes, cookies, pies, and a host of other sweet goods as well. Many cooks prefer using cornstarch as it imparts no additional flavor to foods.
Usage Tips from BigOven
• Cornstarch is a “super-thickener” compared to flour. The starchy granules attract liquids and expand, but only for a short time and not at high temperatures. Use only half as much when substituting for flour. The exception is acidic foods; these will decrease the power of cornstarch.
• Always make a paste of cornstarch and cold water (called a slurry) before adding to heated foods to prevent lumping. Do not overcook as it will begin to break down and thin out. Stir continuously but gently. Vigorous whisking will also cause loss of texture.
• When cornstarch paste is added, cook over medium heat and bring to a boil for about one minute. Remove and serve.
• Do not freeze any cooked recipe that contains cornstarch.
• Cornstarch can cloud a clear sauce but creates a nice sheen on pie crusts.
• Blend it with flour for a richer texture in cakes and pies.
• In Britain, it is called cornflour, but do not confuse this product elsewhere, which refers to a ground cornmeal product.
• If problems occur when using cornstarch, the best remedy is to add more liquid instead of additional cornstarch. In many cases, there may not be enough liquid to begin with, which does not allow the starch granules to enlarge to full capacity. Excessive sugars and fats can also inhibit thickening.
Don't Have Cornstarch? All out of Cornstarch?
Substitute with All-Purpose Flour!
Preparation:
Just replace the cornstarch in your recipe with double the amount of all-purpose flour, and prepare as usual.
Thursday, January 28, 2010
Recipe: Cookies & Cream Fudge
Cookies & Cream Fudge


3 packages (170 g each) white baking chocolate
300 mL can sweetened condensed milk
2 cups coarsely crushed chocolate creme filled sandwich cookies
pinch of salt
1. Melt chocolate with condensed milk and salt. Remove from heat. Stir in crushed cookies.
2. Spread onto parchment paper-lined 8"x 8" squared pan. Chill 2 hours or until firm. Cut into squares. Store in airtight container at room temperature.
Tips/Tricks/Notes
So far, this is the easiest fudge I have tried and it's one of my favourites. It is also a very fast firming fudge, when the recipe says 2 hours, it was ready in 2 hours. I found all the other fudges I have made took much longer before they were ready to be cut and eaten. My one recommendation is if you have a bigger pan then the 8"x 8" I would use it, something around a 9"x 9". I found with the 8"x 8" pan, the fudge turned out very thick and since it is very sweet I had to awkwardly try and cut thin slices.
The picture seen above is an actual picture I took of my completed fudge, it is not taken from the internet or played with in anyway.
Sunday, January 24, 2010
Recipe: Homemade Calzones
Homemade Calzones
Makes: 4 Calzones
1 Whole Wheat Pizza Dough (750 g/26 oz)
Marble Cheese Shredded
Preferred Pizza Tops for Stuffing (See below for ideas)
1. Preheat oven to 375 degrees.
2. Divide pizza dough into 4 smaller dough balls. Take 1 of the smaller dough balls and fallen making sure to keep the dough evenly thick. Place chosen toppings on ONE SIDE only. Make sure that you do not use too much toppings as you won't be able to close the calzone. Once all toppings are placed on one side, fold the empty side over top of the topping side then press the two edges together making sure that there are no holes.
3. Continue this with the other 3 dough balls. Place all on a baking sheet. Bake for 20-25 minutes or until dough is completely baked.
Tips/Tricks/Notes
You must make sure that there are no holes when you fold the dough over the toppings. If there is even a small hole the insides will slowly leak out as they are baking in the oven. Another tip, if you find the dough sticking to your hands as you try and flatten it out, try putting a tiny bit of flour on your fingers.
Some good ideas for toppings; I prefer mine filled with just cheese and pepperoni. My husband likes his with tomato sauce, cheese, pepperoni, olives, mushrooms and bacon bits. Of course the choices are basically endless. I also enjoy dipping mine in either ranch sauce or jalapeno cheddar sauce. Also, I enjoy using marble cheese, but that is also changeable.
The picture seen above is an actual picture I took of my completed calzones, it is not taken from the internet or played with in anyway.
Friday, January 22, 2010
Recipes Coming Soon
Recipes Coming Soon
Below are recipes I plan on trying within the next week to week and a half.
Desserts
Cookies n' Dream Fudge
Root Beer Fudge (pending I can located root beer extract)
Maple Fudge
Dinner
Homemade Calzones
Crock Pot
Chili - I haven't chosen a specific type to try yet.
Below are recipes I plan on trying within the next week to week and a half.
Desserts
Cookies n' Dream Fudge
Root Beer Fudge (pending I can located root beer extract)
Maple Fudge
Dinner
Homemade Calzones
Crock Pot
Chili - I haven't chosen a specific type to try yet.
Wednesday, January 20, 2010
Baking Ingredient Substitution List
Below is a list of a TON of substitutions if you happen to be missing a certain ingredient or maybe have a bunch of something you want to use in a recipe. This list has come in handy a few times already for me!
ammonium bicarbonate - 3/4 teaspoon
1 tsp baking soda
baking powder (single-acting) - 1 teaspoon
1/4 teaspoon baking soda plus 1/2 teaspoon cream of tartar plus 1/4 teaspoon cornstarch
baking powder (double-acting) - 1 teaspoon
1/4 teaspoon baking soda plus 1/2 teaspoon cream of tartar plus 1/4 teaspoon cornstarch. Use 1 tsp for every 1 cup of flour.
baking soda - 1/2 teaspoon
2 teaspoons double-acting baking powder (replace the acidic liquid in recipe with non-acidic liquid)
baking soda - 1/2 teaspoon
1/2 teaspoon potassium bicarbonate
buttermilk - 1 cup (240 ml)
1 tablespoon lemon juice or vinegar plus enough milk to make 1 cup (240 ml) (let mixture stand 5-10 minutes)
cake flour - 1 cup (130 grams)
3/4 cup (105 grams) all purpose flour plus 2 tablespoons (30 grams) cornstarch
cake flour - 1/3 cup
1/3 cup all-purpose flour less 1/2 teaspoon
chocolate (bittersweet or semi-sweet) - 1 ounce (30 grams)
1/2 ounce (15 grams) unsweetened chocolate plus 1 tablespoon (15 grams) granulated sugar
chocolate (unsweetened) - 1 ounce (30 grams)
3 tablespoons (20 grams) natural cocoa powder (not Dutch-processed) plus 1 tablespoon (14 grams) unsalted butter, shortening, or vegetable oil
cocoa powder, Dutch-Processed - 3 tablespoons (20 grams)
1 ounce (30 grams) unsweetened chocolate plus 1/8 teaspoon baking soda. Also reduce fat in recipe by 1 tablespoon.
cocoa powder, natural unsweetened - 1 ounce (30 grams) unsweetened chocolate. Also reduce fat in recipe by 1 tablespoon.
coffee, strong - 1/4 cup (60 ml)
2 tablespoons (10 grams) instant coffee in 3 tablespoons hot water
corn syrup, dark - 1 cup (240 ml)
3/4 cup (180 ml) light corn syrup plus 1/4 cup (60 ml) light molasses
corn syrup, light - 1 cup (240 ml)
1 cup (200 grams) granulated white sugar (increase the liquid in the recipe by 1/4 cup or 60 ml)
cornstarch (for thickening) - 1 tablespoon (15 grams)
2 tablespoons (25 grams) all purpose flour
cream of tartar - 1/2 teaspoon
1/2 teaspoon white vinegar or lemon juice
cream - half-and-half - 1 cup (240 ml)
7/8 cup (210 ml) whole milk plus 2 tablespoons (25 grams) melted unsalted butter
cream, heavy (not for whipping) - 1 cup (240 ml)
2/3 cup (160 ml) whole milk plus 1/3 cup (75 grams) melted unsalted butter
flour, self-rising - 1 cup (140 grams)
1 cup (140 grams) all-purpose flour plus 1-1/2 teaspoons baking powder plus 1/4 teaspoon salt
flour, whole wheat - 1 cup (150 grams)
7/8 cup (120 grams) all-purpose flour plus 2 tablespoon (6 grams) wheat germ
honey - 1 cup (240 ml)
3/4 cup (180 ml) light or dark corn syrup plus 1/2 cup (100 grams) granulated sugar
lard - 1/2 cup (113 grams)
1/2 cup (113 grams) solid vegetable shortening
lard - 1/2 cup (113 grams)
1/2 cup (113 grams) plus 1 tablespoon (14 grams) unsalted butter
marhsmallow cream - 2.5 ounces
8 large marshmallows or 1 cup miniature marshmallows
milk (sweetened condensed) - 14 ounce can (396 grams)
blend 1 cup instant nonfat dry milk plus 2/3 cup (135 grams) granulated sugar plus 3 tablespoons (35 grams) melted unsalted butter plus 1/2 cup (120 ml) boiling water
milk (evaporated whole) - 1 cup (240 ml)
1 cup (240 ml) half & half
milk (whole) - 1 cup (240 ml)
1 cup (240 ml) skim milk plus 2 tablespoons (25 grams) melted butter or margarine
molasses - 1 cup (240 ml)
1 cup (240 ml) dark corn syrup
sour cream - 1 cup (225 grams or 8 ounces)
1 cup plain yogurt
sour cream - 1 cup (225 grams or 8 ounces)
1 tablespoon lemon juice or vinegar plus whole milk to fill 1 cup (240 ml)
tapioca, instant or quick-cooking - 1 tablespoon (12 grams)
1-1/2 tablespoons (20 grams) flour
vinegar - 1/4 cup (60 ml)
1/3 cup (80 ml) freshly squeezed lemon juice
yogurt, plain - 1 cup (225 g)
1 cup (225) sour cream
Friday, January 15, 2010
Recipe: Peanut Butter Fudge
Peanut Butter Fudge

This is a SUPER easy and VERY yummy fudge! The only issue with this recipe was that at the time I first found it I didn't have a scale to measure out the 1 pound of sugar. I wanted to get one for many recipes and other things around the kitchen, so I invested in a high quality one, then I was able to complete this recipe. That would be the only down side to this recipe.
The picture seen above is an actual picture I took of my completed fudge, it is not taken from the internet or played with in anyway.

1 cup creamy peanut butter
1 cup butter
1 pound of powdered sugar
1 tsp vanilla
1. Line a 9" square pan with wax paper.
2. Melt the butter in a sauce pan on low heat, add the peanut butter and stir well making sure to fully blend. Remove from heat and cool.
3. In a large bowl, mix the powdered sugar and vanilla.
4. When the peanut butter/butter mixture is cooled, add it to the powered sugar and mix thoroughly until smooth.
5. Pour the mixture into the pan. Cover with waxed paper. Refrigerate for 4-6 hours or overnight.
Tip/Tricks/Notes
This is a SUPER easy and VERY yummy fudge! The only issue with this recipe was that at the time I first found it I didn't have a scale to measure out the 1 pound of sugar. I wanted to get one for many recipes and other things around the kitchen, so I invested in a high quality one, then I was able to complete this recipe. That would be the only down side to this recipe.
The picture seen above is an actual picture I took of my completed fudge, it is not taken from the internet or played with in anyway.
Monday, January 11, 2010
Recipe: Crock Pot - Mac and Cheese
Crock Pot Recipe - Macaroni and Cheese

2 cups of macaroni
1 tbsp vegetable oil
1 can (13oz) evaporated milk
1 1/2 cups milk
1 tsp salt
4 cups sharp cheddar cheese - shredded
1/2 cup butter - melted
1. Cook macaroni in boiling salted water - follow package directions. Drain well. Grease bottom and sides of crock pot.
2. Toss macaroni in crock pot with oil. Add remaining ingredients. Stir gently to combine. Cover.
3. Cook on low for 3 to 4 hours. Stir occasionally.
Tips/Tricks/Notes
This recipe is a much better Mac and Cheese then Kraft Dinner! It turned out great, and is just cheesy enough! I don't have any tips for this recipe other then it makes enough pasta to feed an army!
The picture seen above is an actual picture I took of my completed pasta, it is not taken from the internet or played with in anyway.
Subscribe to:
Comments (Atom)
Links
